-40%
Oscilloscope Clock Kit OSC4.4 original vector design crt Cathode ray tube Scope
$ 52.8
- Description
- Size Guide
Description
Made in the USA. This is the original, vector style version, OSC4.4 with hand drawncharacters. For the new design, please see my other listings.
Please note that the oscilloscope clock shown is for
demonstration
only, and the CRT
and enclosure are not included in the kit.
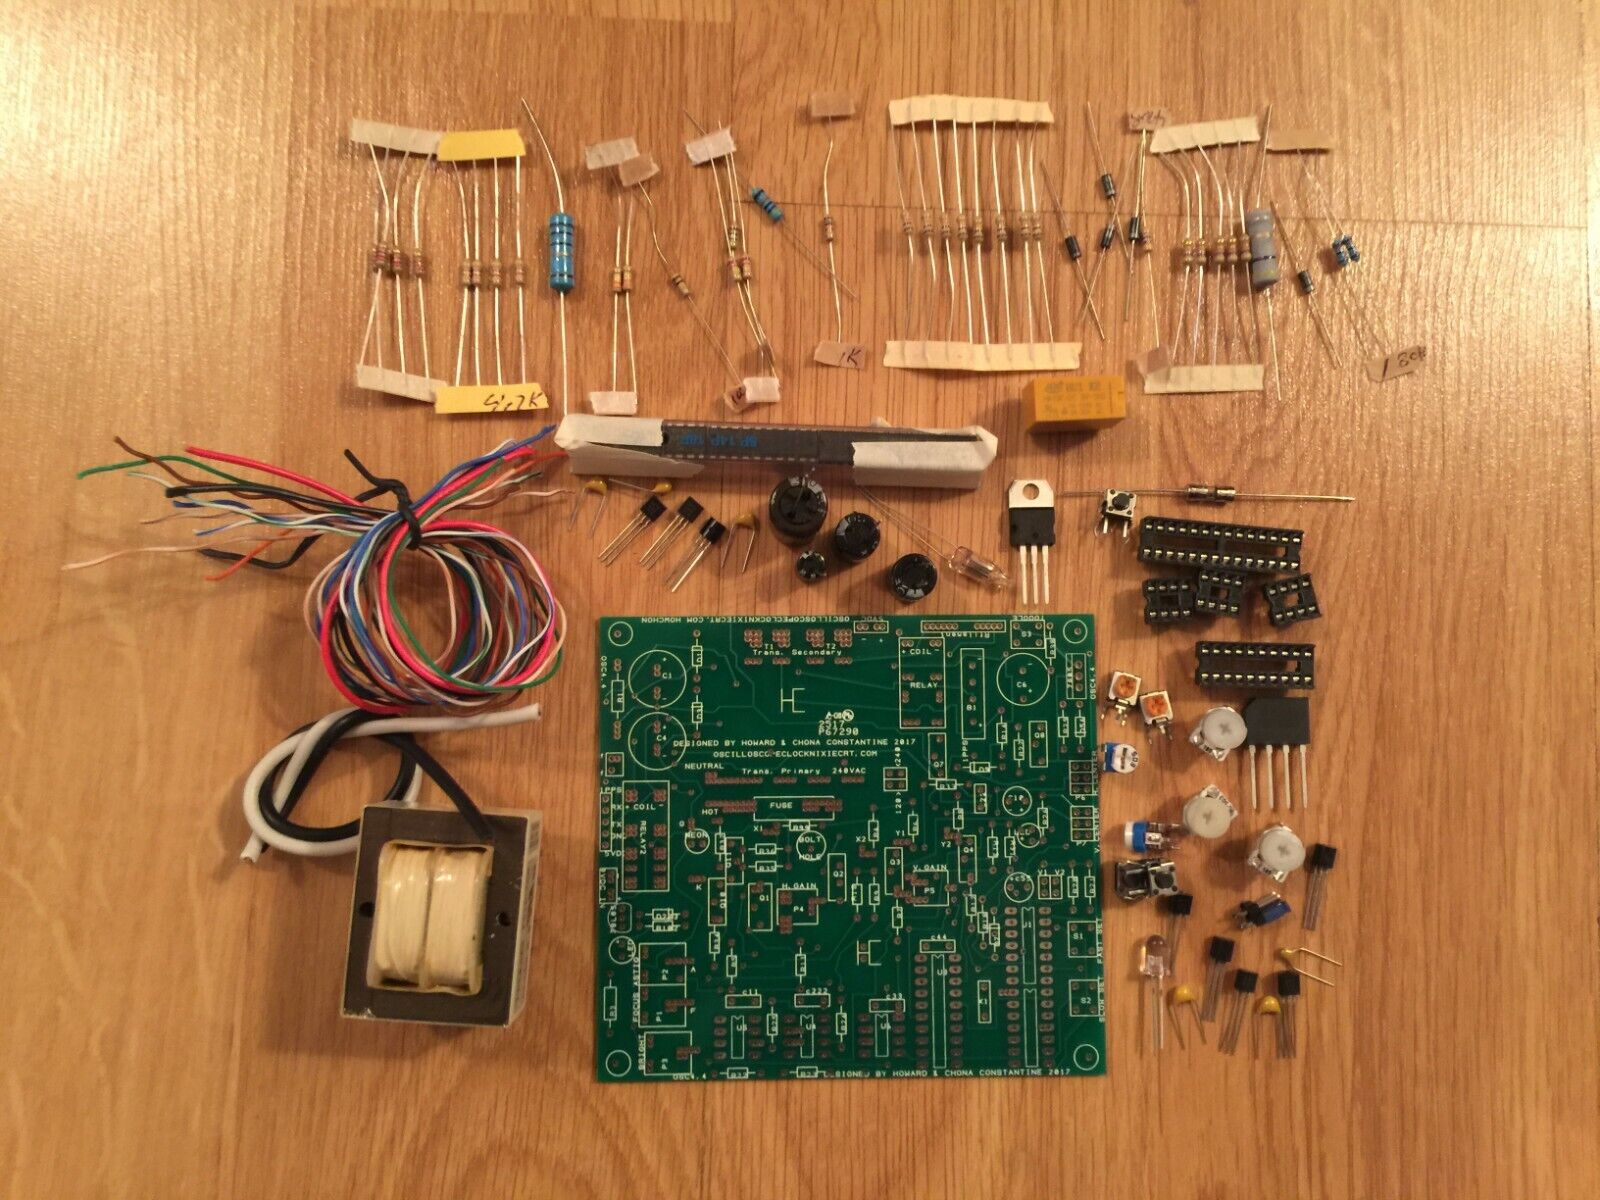
The kit I have available is a professionally made pc board and the components to populate it,
including the ICs and the preprogrammed microcontrollers written with my firmware, and transformer.
It uses a simple low voltage dual secondary transformer and a line fed voltage multiplier for the HV.
I supply the instructions for assembly and a parts list with the board and components.
Some CRT types that I have used with this board are: DG7-32, DG7-6, 2AP1, 2BP1, LB-8,
6Loi1, 50HB1, 7SJ33J, 3SP1, B7S2, LO-247, 3GP1, 3Lo1i, 1EP1.
Many other small relatively low voltage CRTs may work with the kit.
Automatically sets for 50/60HZ. The display alternates every ten seconds between digital and analog style.
Display also moves
slightly every six seconds to help prevent "burn in" of the crt.
The microcontroller and all chips are in sockets for easy replacement.
It can be set for 120VAC (U.S. standard) or 240VAC (some other countries).
Below are the operating
instructions.
I will ship it anywhere in the world, but I
cannot be responsible for problems and/or delays caused by customs
in your
country.
International buyers,
please send your address for a shipping quote.
Instruction set for scope clock
It can be set for either 120VAC or
240VAC, please see the small four pin header
marked 120> <240 and set the jumper on the
appropriate
two pins..
When plugged in, the blue led should light immediately, and there should be a
small “click” sound of the relay engaging. The orange (neon) bulb should light.
After several minutes, the filament should warm sufficiently and the screen
should display “1”, (number one). This means 60HZ was detected, and set
accordingly. If a zero appears instead, then 50HZ was erroneously detected.
Unplug, wait until the blue led goes off, and then plug back in.
The time set buttons are a pair situated close together, one is fast set, and the
other slow set.
To set time without programming any preset on/off times , just press the slow set
button (on the left) once and the clock face should appear , then use the two
buttons on the front to set time .
To manually turn the display on/off, press the toggle button (separate from the
two set buttons).
To program the preset on/off times:
Press the fast set & slow set buttons at same time, the screen should display the
clock face without hands.
Press the fast set button again, and the hours hand should appear .Each time
that button is pressed, the hours hand should increment once. When the desired
hour is shown for ON time (AM only),
Press the slow set button once to confirm, the colons (dots) should appear, this
indicates the ON time is set.
Press either button once to enter the OFF time set mode. Follow the same
procedure , and after the OFF time is confirmed ( colons appear ) , either press
slow set to enter normal timekeeping ( fast set , slow set ) mode , or , to set the
second set of preset on / off times , press fast set and follow the same procedure
, except this time you will be selecting first a PM on time , then an AM off time .
Please refer to the youtube link for illustration:
DEMO
Note: The clock will display 12:00 AM to start, so if the present time is after noon,
you will need to advance the time past 12:00 in order to reach the PM hours, else
the preset on/off times may be reversed. I.E.: if the present time is 8:00 PM, you
need to advance PAST 8:00 once, and then stop at 8:00.
